YSEN’S · PROFESSIONAL BROW EDUCATION
A clear brow design starts with marks you can read. A pencil places and refines those marks, pre-inked string transfers straight guidelines, and paste makes the planned boundary easier to see. Choose the tool for the part of the design you need to control.
Brow mapping pencil vs string vs paste
| Tool | Most useful for | What to watch |
|---|---|---|
| Mapping pencil | Placing reference points, connecting short sections and refining an arch or tail | A broad mark makes the exact intended edge harder to identify |
| Pre-inked mapping string | Transferring straight guidelines between selected reference points | A straight line still needs the correct placement |
| Brow mapping paste | Framing the proposed shape with a visible border | Heavy application can hide the hairline you need to assess |
Think about the mark you need next. If one tail needs a small adjustment, reach for the pencil. If you are checking alignment across both brows, string may help. If the outline is difficult to distinguish from surrounding skin and hair, paste can make it easier to review.
What is a brow mapping pencil used for?
A brow mapping pencil is a marking tool for planning eyebrow shape. Its strength is local control: a small point at a chosen landmark, a short section connecting two points, or a careful correction along the intended outline.
It is particularly useful where a long straight guideline cannot describe the finished shape on its own. Around the arch and tail, work in short, readable sections so you can reassess the contour as you go.

How to choose and use the pencil
Look for a tip you can maintain, a mark you can see clearly under your working light, and removal directions that fit the planned service. Keep the point controlled and use light pressure. If a line becomes too wide, remove the unwanted part before drawing again instead of layering another competing outline beside it.
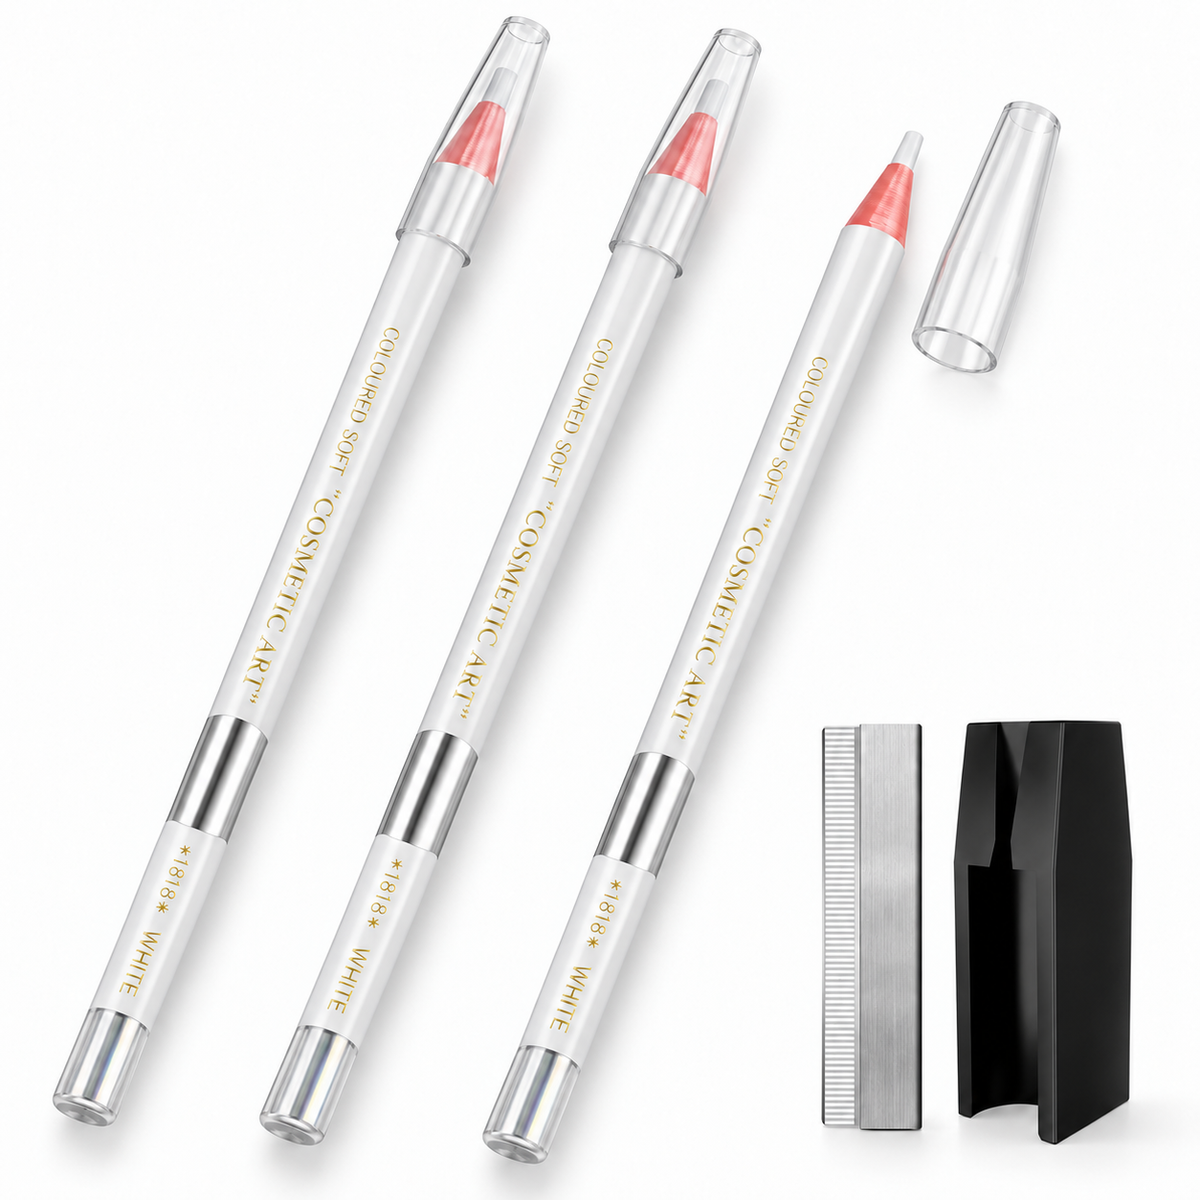
The YSEN’S mapping pencil set includes three pencils and a two-piece sharpening tool. It suits artists who already have their other mapping supplies and need to replenish pencils.
When is brow mapping string more useful?
Pre-inked brow mapping string transfers pigment as you gently place it against the skin. It is useful for making straight reference lines and comparing the position of your selected points across the brow area.
The line is a reference, not a finished brow shape. You still need to assess natural growth, facial features and the client's requested result before refining the outline.

Keep the transferred line readable
Prepare the area for the planned service, select a fresh section of string and hold it under gentle, controlled tension. Transfer the required line without dragging the thread across the skin. If it prints twice or smudges, clean up the unclear mark and recheck placement before repeating it.
Choose the color by visibility on the individual client under your working light. YSEN’S 30 m pre-inked mapping string is available in Black, White and Pink. No single color is the best choice for every client.
What does brow mapping paste do?
Brow mapping paste frames the proposed eyebrow shape. Once the points and outline are established, an angled brush can place a visible border around the design so you and the client can assess it more easily.
Keep that border controlled. The edge nearest the intended brow should remain easy to identify; a thick band that covers the natural hairline can make the design harder to judge.

Does white brow paste stop tint from staining the skin?
Do not assume every mapping paste is a protective barrier for every tint or treatment. For YSEN’S white brow paste, the confirmed purpose here is to frame the planned shape. Whether a product may remain in place during tinting depends on the directions for that paste and the selected tint system.
Apply paste with a clean angled brush, using a small amount for edge control. Follow the next service's instructions for removing or retaining mapping marks before treatment.
Which brow mapping tools should you buy?
Start with the task your current setup does poorly. You may need a replacement marking tool rather than another complete kit.
| Your main need | Useful starting choice |
|---|---|
| Small point marks and detailed outline corrections | A mapping pencil |
| Straight reference lines across the brow area | Pre-inked mapping string |
| A more visible frame around an established outline | Mapping paste and an angled brush |
| A complete measuring and marking setup | A kit with a ruler, pencil, string, paste and brushes |
The YSEN’S Brow Mapping Kit combines these tools for artists building a complete setup. If the rest of your kit is already working well, replace only the component you need.
Already have some tools? Buy for the missing task
If your ruler and string already give clear reference lines, a replacement pencil may be all you need for local corrections. Add paste when the outline needs a more visible frame. A complete kit makes sense when you need the measuring, marking and outlining tools together—not merely because one item has run out.
A practical example: use each tool where it helps
Imagine that your reference points are established, but the two proposed tails are difficult to compare and one lower edge looks unclear.
- Check alignment with string. Transfer the relevant reference line so the selected points can be compared.
- Refine with the pencil. Make the local adjustment to the proposed tail and reconnect the short outline section.
- Add a paste border if needed. Frame the corrected design without obscuring the natural growth.
- Review the whole face. Check both sides with a relaxed expression and discuss the proposed shape with the client before proceeding.
This is a tool-selection example, not a universal treatment sequence. Brow tinting, lamination and PMU each have their own preparation and product requirements.
Keep one readable outline
Remove rejected marks before redrawing. If the position is wrong, adding more pencil or paste makes it darker, not more accurate. Keep the natural growth visible and review both brows with the client’s forehead relaxed.
For each client, use fresh string and clean tools. Keep used thread out of the dispenser, avoid double-dipping used applicators into the paste jar, and do not return dispensed paste to the jar. Follow the pencil manufacturer's hygiene instructions; sharpening alone should not be treated as a complete cleaning procedure.
Frequently asked questions
Is mapping thread the same as threading hair removal?
No. Here, mapping thread means pre-inked string used to transfer guide marks. Hair-removal threading is a different technique.
Can I use a regular eyebrow pencil?
Check its intended use and directions. Pencil formulas and tip shapes vary, so assess the actual mark rather than relying on the product name alone. Choose a product that gives a controlled, removable guide suitable for the planned service.
Do these tools tint the brows?
They are not a brow tinting system. Pencils and pre-inked string deposit temporary visible pigment for mapping; that is different from a brow tint treatment. Tinting requires a separate, appropriate tint system; the YSEN’S mapping kit does not include tint or treatment lotions.
For the complete placement sequence, continue with the step-by-step brow mapping guide.
Choose the next tool by the mark you need: a point to refine, a line to compare, or a boundary to clarify. A readable map makes the design easier to assess before the service begins.


Leave a comment
This site is protected by hCaptcha and the hCaptcha Privacy Policy and Terms of Service apply.