
Direct answer: A professional lash lift setup normally includes cleansing supplies, eye-area protection, correctly sized pads or shields, a lash-separation tool, a compatible fixation product, precise applicators, a timer, inspection mirror and hygiene supplies. The exact tools depend on the treatment system, but every item should support one of five tasks: preparation, protection, placement, controlled processing or final inspection.

Watch: a complete YSEN’S lash and brow lift workflow showing tools in use.
What Tools Are Needed for a Professional Lash Lift?
A professional lash lift requires more than lotions and silicone pads. The artist also needs tools for preparing the eye area, protecting the lower lashes, fitting the pad, positioning the natural lashes, applying products accurately and inspecting the result.
The required setup varies according to:
- the lash lift system being used;
- the client’s natural lash length and direction;
- the selected pad, rod or shield;
- whether the service includes tinting;
- the product manufacturer’s directions;
- the artist’s training and local professional requirements.
Not every tool listed below is required for every system. Use this checklist as a workstation-planning guide, then compare it with the instructions supplied with your products.
Professional Lash Lift Tools Checklist by Treatment Stage
| Stage | Tools and supplies | Primary purpose |
|---|---|---|
| 1. Consultation and assessment | Consultation record, lighting, magnification and inspection mirror | Assess natural lashes and record relevant service information |
| 2. Preparation | Clean applicators, eye-area cleansing supplies, lint-free materials, headband and clean tray | Prepare the working area and natural lashes according to the system directions |
| 3. Lower-lash protection | Eye patches, lower-lash pads or suitable professional tape | Help keep lower lashes separate from the working area |
| 4. Pad selection and fitting | Lash lift pads, rods or shields in appropriate sizes | Create the styling surface and intended lash direction |
| 5. Lash placement | Glue balm or compatible adhesive, laminator brush, lash comb and fine applicators | Position, separate and align the natural lashes on the pad |
| 6. Product application | Micro applicators, lip brushes or other system-approved applicators, product dishes and paper strips where directed | Support controlled placement of the treatment products |
| 7. Timing and monitoring | Reliable timer, adequate lighting and inspection mirror | Follow the product directions and inspect placement during the service |
| 8. Removal and final check | Clean applicators, mirror, lash comb and manufacturer-recommended removal materials | Remove products as directed and inspect the final lash direction |
| 9. Cleanup | Covered waste container, cleaning supplies and separate storage for cleaned reusable tools | Support responsible disposal, cleaning and workstation organisation |
Stage 1: Consultation and Natural Lash Assessment
Before selecting pads or opening treatment products, inspect the natural lashes and the available eyelid space. Good lighting is essential because lash length, density and growth direction may vary across the inner, centre and outer sections.
Useful Assessment Tools
- Inspection mirror: provides an additional viewing angle for checking lash direction and symmetry.
- Task lighting: helps the artist see fine lashes without relying on shadows or uneven room lighting.
- Magnification: may help with detailed inspection when used appropriately.
- Consultation record: documents relevant observations, products used and the selected pad.
An inspection mirror is an aid, not a guarantee of a particular result. It should be used together with direct visual inspection and appropriate training.
View YSEN’S Eyelash Lift Mirror Pro
Stage 2: Workstation and Lash Preparation
Arrange the workstation before the client service begins. The artist should be able to reach clean tools without searching through drawers or touching unrelated surfaces during the procedure.
Preparation Checklist
- clean treatment tray;
- clean hands and appropriate personal protective equipment;
- eye-area cleansing supplies specified by the system;
- lint-free applicators or materials;
- clean headband where required;
- separate areas for clean tools, used tools and waste;
- product instructions available for reference;
- timer tested and ready.
Do not prepare products in unlabelled containers unless this is consistent with the manufacturer’s directions and professional requirements. Keep original product labels available so the identity, warnings and directions can be checked.
Stage 3: Lower-Lash Protection
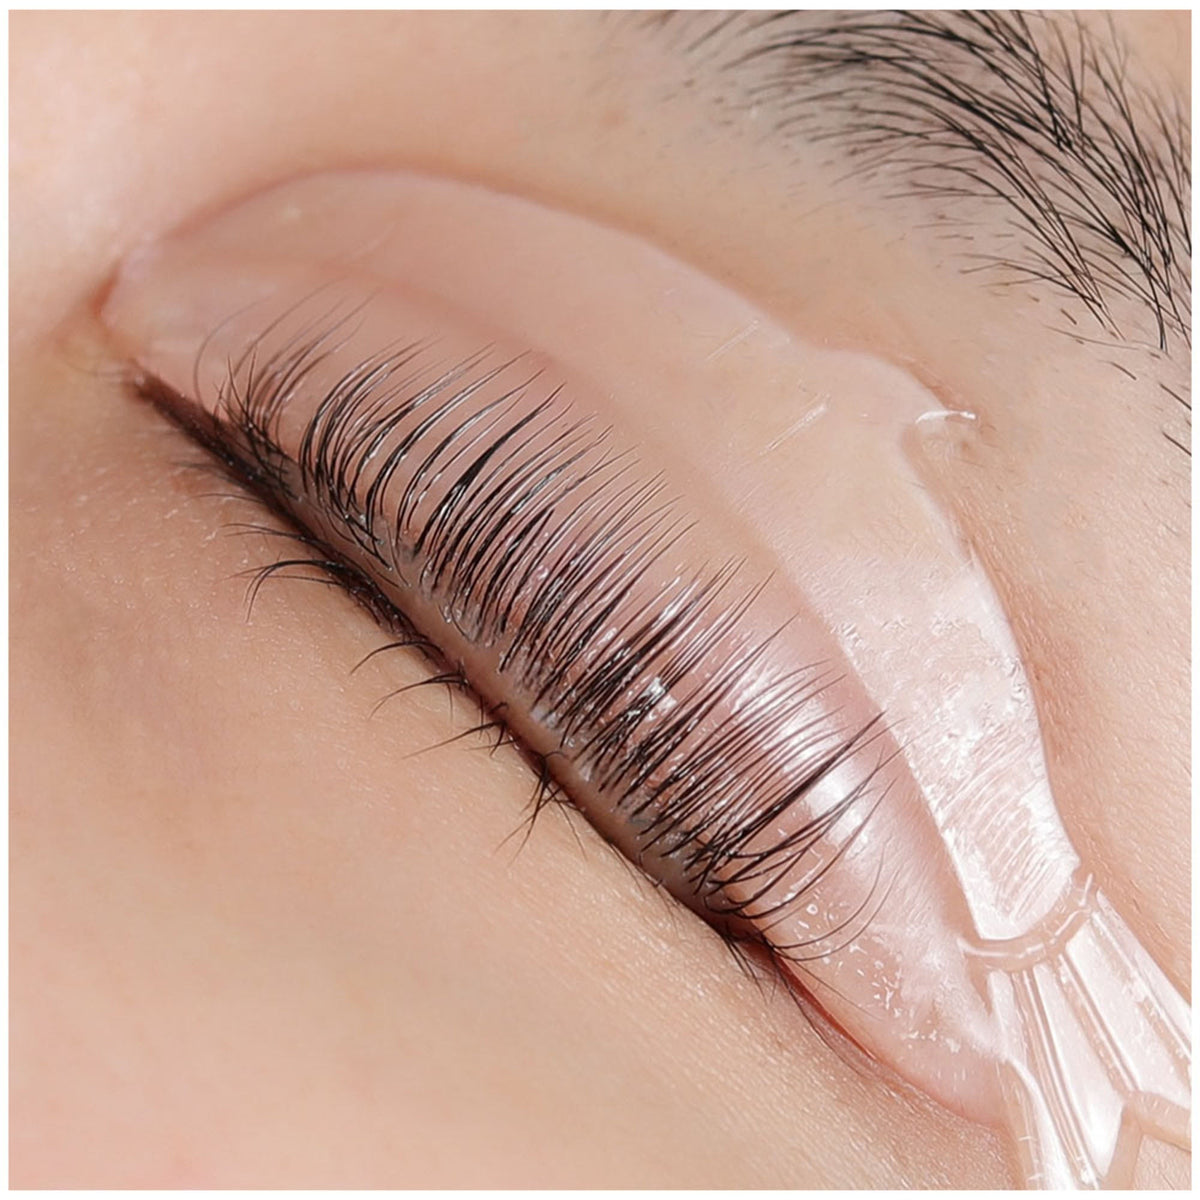
Lower lashes should be kept separate from the upper-lash working area. Depending on the system and the client’s eye shape, an artist may use professional eye patches, lower-lash pads or suitable tape.
Lower-Lash Protection Tools
- Eye patches: help cover and separate the lower lashes.
- Lower-lash shields or pads: provide another fitting option for different eye shapes.
- Professional micropore tape: may assist with targeted isolation when appropriate for the service.
Do not place patches or tape inside the eye or so close that they cause discomfort. Check the client’s comfort and eye closure before continuing. Tape and adhesive products can cause reactions in some users, so follow their directions and relevant salon procedures.
Explore Lash Lift Pads and Eye-Area Accessories
Stage 4: Selecting Pads, Rods or Shields
The pad, rod or shield creates the styling surface for the natural lashes. It is not simply an accessory: its size and curve influence how the lashes are positioned during the service.
A Professional Pad Selection Should Consider:
- natural lash length;
- inner and outer lash length;
- natural growth direction;
- available eyelid space;
- eye shape;
- pad curve and usable styling area;
- intended styling direction;
- manufacturer instructions.
Dry-fit the clean pad before applying treatment lotions. Check the centre, inner corner and outer corner rather than assessing only the longest lashes.
Read: Beginner’s Guide to Choosing Lash Lift Pads
Read: Korean Lash Lift Pads vs Rods and Shields
Shop YSEN’S Lash Lift Pads, Rods and Shields
Stage 5: Fixing and Separating the Lashes
Once the pad is positioned, the natural lashes must be arranged on the styling surface. The artist needs enough control to separate the lashes without crossing, twisting or bunching them together.
Fixation and Separation Tools
- Lash lift glue balm or compatible liquid adhesive: helps position lashes when used according to its directions.
- Laminator brush: supports brushing, separating and directional placement.
- Lash lift comb: helps separate fine lashes and refine alignment.
- Fine disposable applicators: support controlled work in smaller sections.
Use only an adhesive intended for the relevant lash lift application. Eyelash extension adhesive, strip-lash glue, household glue and craft adhesive are not substitutes for a lash lift fixation product.
Begin with a small amount of fixation product. Excessive balm or adhesive may make separation more difficult or obscure the lash direction.
View the YSEN’S Glue Balm Laminator Brush
View the YSEN’S Eyelash Comb Pro
View YSEN’S Lash Lift Glue Balm
Read: Lash Lift Glue Balm vs Liquid Adhesive
Stage 6: Controlled Product Application
Treatment products should be applied only in the areas and quantities described by their manufacturer. Precise applicators help the artist control product placement without relying on oversized brushes or improvised tools.
Common Application Tools
- micro applicators;
- fine disposable brushes;
- lip brushes when suitable for the system;
- clean product dishes or ring cups where directed;
- paper strips or lifting covers where included in the procedure;
- clean removal applicators reserved for each step.
Do not use the same applicator to move between different products unless the manufacturer specifically directs this. Avoid returning a used applicator to the original container.
Paper strips and covers are not automatically required for every lash lift. Use them only when they are part of the product system or application method.
Explore YSEN’S Lash Lift Tools
Stage 7: Timing and Monitoring
A reliable timer is a workflow tool, not a method for deciding the processing time. Processing instructions can vary between products and should not be copied from another brand, client or previous service.
Monitoring Tools
- Timer: helps the artist follow the directions for the exact product being used.
- Inspection mirror: helps check the lashes from another angle.
- Adequate lighting: supports visual inspection of lash alignment and product placement.
- Service record: documents products and observations for professional reference.
Do not estimate processing by habit or use an unverified universal timing chart. Follow the directions and warnings supplied with the treatment products.
Stage 8: Product Removal and Final Inspection
Remove each product according to its specific instructions. Avoid using a removal method simply because it worked with another adhesive, balm or lotion system.
Final Inspection Checklist
- check the inner, centre and outer lash sections;
- look for crossed or twisted lashes;
- inspect both eyes from comparable angles;
- confirm that visible product residue has been addressed as directed;
- check client comfort;
- provide aftercare that matches the products used.
A lash lift mirror can support this inspection, but it does not replace direct assessment or qualified professional judgement.
Stage 9: Cleanup, Disposal and Storage
Single-use and reusable tools should not be handled in the same way.
Single-Use Items
Dispose of single-use applicators, paper products and other disposable supplies after the service. Do not wash or reuse an item that is labelled for one-time use.
Reusable Tools
Clean and process reusable tools according to their materials, manufacturer directions and applicable salon hygiene requirements. A tool described as reusable is not necessarily compatible with every disinfectant or sterilisation method.
Product Storage
- close product containers promptly;
- keep labels legible;
- store products according to their directions;
- keep clean and used tools physically separate;
- check product condition before each service;
- do not add water or saliva to restore a dried or changed product.
Essential Tools vs Optional Tools
| Priority | Examples | How to decide |
|---|---|---|
| Core setup | Cleaning supplies, lower-lash protection, pads or shields, fixation product where required, applicators, timer and lighting | Needed to prepare, protect, position, apply and monitor the service |
| Precision tools | Laminator brush, professional lash comb, inspection mirror and fine applicators | Useful for improving visibility, separation and placement control |
| System-dependent tools | Paper strips, lifting covers, tape, ring cups and additional shields | Use when required by the product directions or selected workflow |
Professional, Beginner and Home-User Tool Needs
Professional Lash Artists
Professional artists benefit from multiple pad sizes, precision tools, organised single-use supplies, inspection tools and documented hygiene procedures. They may also need backup tools so a service is not interrupted if an item becomes contaminated or damaged.
Lash Lift Beginners
Beginners should start with a clearly documented system rather than collecting unrelated tools from different brands. A smaller, organised setup is more useful than a large tray of products with conflicting directions.
Training should cover pad selection, lash separation, contraindications, product application, timing, hygiene and appropriate response to unexpected reactions.
Informed Home Users
Home users should only use products specifically intended for personal use. Products labelled for professional use should be handled by appropriately trained users. A kit being available online does not automatically mean it is suitable for every person or every use setting.
Salons and Wholesale Buyers
Salons and distributors should evaluate more than unit price. Consider consistent product identification, storage requirements, instructions, replacement availability, tool durability and whether supplies are single-use or reusable.
Explore YSEN’S Wholesale and Distribution Options
Restock by the Missing Task
Check your existing setup against the stage-by-stage table before ordering. Replace disposable supplies as needed; inspect reusable tools before counting them as available. If lotions alone are running low, compare kits and refill sachets. If placement is the difficulty, identify whether you need better visibility, separation or a different pad fit before adding more tools.
Professional Workstation Setup
A practical workstation can be divided into four zones:
- Clean zone: unopened or prepared single-use items and cleaned reusable tools.
- Working zone: the products and applicators required for the current step.
- Used-tool zone: reusable tools awaiting the appropriate cleaning process.
- Waste zone: a suitable container for used disposable supplies.
Keep the working area uncluttered. Only place the tools required for the current service on the tray.
Safety and Responsible Use
- Read the directions, ingredient information and warnings for every product.
- Use products only for the application identified by the manufacturer.
- Keep hands, tools and the working area clean.
- Avoid using eye-area cosmetics when an eye infection is present or the surrounding skin is inflamed.
- Prevent treatment products and tools from contacting the eye.
- Stop the service if irritation or an unexpected reaction occurs.
- Seek appropriate medical advice if symptoms persist or an eye injury is suspected.
- Follow local professional, hygiene and disposal requirements.
No tool can make a lash lift universally safe, irritation-free or suitable for every client. Safe practice depends on product selection, instructions, hygiene, technique, client assessment and appropriate training.
Related YSEN’S Products and Guides
- Professional Lash Lift Tools & Accessories
- Lash Lift Pads, Rods and Shields
- Glue Balm Laminator Lash Lift Brush Pro
- Eyelash Comb Pro
- Eyelash Lift Mirror Pro
- Lash Lift Glue Balm
- Lash and Brow Lift Systems
Frequently Asked Questions
Do I need a lash lift comb and a laminator brush?
Not every workflow requires both. A lash comb can help separate and align fine lashes, while a laminator brush supports brushing and directional placement. Artists may select one or both according to their technique and product system.
Can the same lash lift tools be used on every client?
Reusable tools may be used again only when their materials and instructions allow it and they have been processed according to applicable hygiene procedures. Single-use items should be discarded after the service.
Can I use cotton buds instead of professional applicators?
Only use an applicator when it is suitable for the product and application described by the manufacturer. Large or lint-producing applicators may offer less control near the lash line than a fine, purpose-appropriate tool.
Do I need paper strips for every lash lift?
No. Paper strips or lifting covers are system-dependent. Use them when they are included in the manufacturer’s procedure, not automatically with every pad or lotion system.
Can beginners use professional lash lift tools?
Tools can support placement and organisation, but they do not replace training. Beginners should learn pad selection, product directions, hygiene, lash separation and responsible eye-area practice before performing a service.
What should a lash artist keep as backup supplies?
A professional setup may include additional clean applicators, lower-lash protection, multiple pad sizes, a backup timer and replacement tools. Backup items should remain clean, correctly stored and within their usable condition.
Final Checklist
- Consultation and service record ready
- Clean, well-lit workstation prepared
- Lower lashes appropriately protected
- Correct pad, rod or shield dry-fitted
- Compatible fixation product selected
- Lash-separation tools prepared
- Separate applicators ready for each product step
- Timer and instructions visible
- Inspection mirror available
- Clean-tool, used-tool and waste areas separated
- Aftercare matched to the products used
A professional lash lift tray should not contain every available accessory. It should contain the correct clean tools for the client, product system and current treatment stage.
Shop YSEN’S Professional Lash Lift Tools and Accessories
Author: YSEN’S Content Team
Last updated: July 13, 2026
Editorial note: This checklist provides general workflow and tool-selection information. Always follow the directions and warnings supplied with the specific lash lift products and tools being used.
Further reading: U.S. FDA — Eye Cosmetic Safety

Leave a comment
This site is protected by hCaptcha and the hCaptcha Privacy Policy and Terms of Service apply.